Building a Kubernetes Dev Cluster
Kubernetes - κυβερνήτης, Greek for “helmsman”
Intro
The first Kubernetes post has arrived. Recently I’ve been doing a good amount of work in Kubernetes (K8s), using minikube on my local machine for dev work. While it’s good for small workloads, larger apps seem to really crush minikube and my computer.
Since I’ve got access to a XCP-ng cluster I decided I should build a Kubernetes dev cluster to work from! So this means no more minikube running locally, or having to pay for a small EKS cluster ($0.10 per hour for EKS plus the cost of compute) to run on.
For this implementation I’m using Ubuntu 18.04 as the cluster’s OS. This install guide is pretty much the same for 20.04, in the future I’ll reinstall the cluster on 20.04. For the Kubernetes installation kubeadm is going to be used. Two VMs have been provisioned with 8 vCPUs and 8 GiB memory each, that should be good enough for this dev cluster.
This is meant to help you get a dev cluster up and running quickly. If you’re new to Kubernetes, I recommend further reading on the topic; in addition to this guide.
Pre-Flight
Run through the pre-flight checks on the servers you’ll be installing.
- Set your hostname(s)
1 | sudo hostnamectl set-hostname k8smaster.int.mikemiller.tech |
- Setup your hosts files
1 | $ cat /etc/hosts |
- Disable Swap
1 | sudo swapoff -a |
- Remove nano, if you don’t want it :)
sudo apt remove nano
- Remove snap
We shouldn’t have snap on these systems.
1 | # Remove any of the default snaps |
Reboot
Docker
Using Docker as the container runtime for this implementation.
1 | sudo apt update |
Make sure /etc/docker/daemon.json looks like this
1 | { |
Restart docker sudo systemctl restart docker
Kubernetes
Yes, still using Xenial repos; as that’s what’s available.
1 | sudo apt update && curl -s https://packages.cloud.google.com/apt/doc/apt-key.gpg | sudo apt-key add - |
Helm
1 | curl -s https://baltocdn.com/helm/signing.asc | sudo apt-key add - |
Install K8s
Master
1 | sudo kubeadm init --pod-network-cidr=10.244.0.0/16 --apiserver-advertise-address=<SERVER_IP> |
Get your kubeconfig. Move this to any other server, or machine you want to control the cluster from.
1 | mkdir -p $HOME/.kube |
Allow the master to run pods
1 | kubectl taint nodes --all node-role.kubernetes.io/master- |
Worker
Once the above command finishes, it should output a command we can use to join the worker. It’ll look something like this
1 | sudo kubeadm join 10.0.0.245:6443 --token gg7rod.hux88t845aqlk5yd --discovery-token-ca-cert-hash sha256:123456789b1904e3e698610b00782b1b041ead66cf992c611cece61b3eeafaee |
Label the worker
1 | kubectl label node k8snode.int.mikemiller.tech node-role.kubernetes.io/worker=worker |
Install Calico
Calico is our networking and network security for the cluster. Read more about it here.
1 | kubectl apply -f https://docs.projectcalico.org/manifests/calico.yaml |
metallb
Now we need to install metallb, so that can have a load balancer available to our cluster. Read more about metallb here
Run kubectl edit configmap -n kube-system kube-proxy
And set the following
1 | apiVersion: kubeproxy.config.k8s.io/v1alpha1 |
Let’s configure metallb, with the IPs it’s allowed to handout.
vim metallb.yaml
1 | configInline: |
Install it
1 | helm repo add metallb https://metallb.github.io/metallb |
nginx controller
1 | helm repo add ingress-nginx https://kubernetes.github.io/ingress-nginx |
Test it
Let’s deploy something, to test this. I’ve got a small app put together for testing.
1 | helm install k8s-flask-react k8s-flask-react/ |
This shows our small app is working, on our Kubernetes lab cluster! 🎉
Monitoring
Let’s add some bare bones monitoring. Take note, that this configuration has no persistence; that’s for another episode.
Let’s get our values for Prometheus.
Prometheus.yaml
1 | pushgateway: |
Install Prometheus
1 | helm repo add prometheus-community https://prometheus-community.github.io/helm-charts |
Install Grafana
1 | helm repo add grafana https://grafana.github.io/helm-charts |
Update the grafana service, to be of the LoadBalancer type. This is so we don’t have to do any K8s proxy magic.
Then we get the admin password
1 | kubectl get secret --namespace monitoring grafana -o jsonpath="{.data.admin-password}" | base64 --decode ; echo |
Now we can check it out
1 | kgs -n monitoring | grep -B1 grafana |
Setup the data source
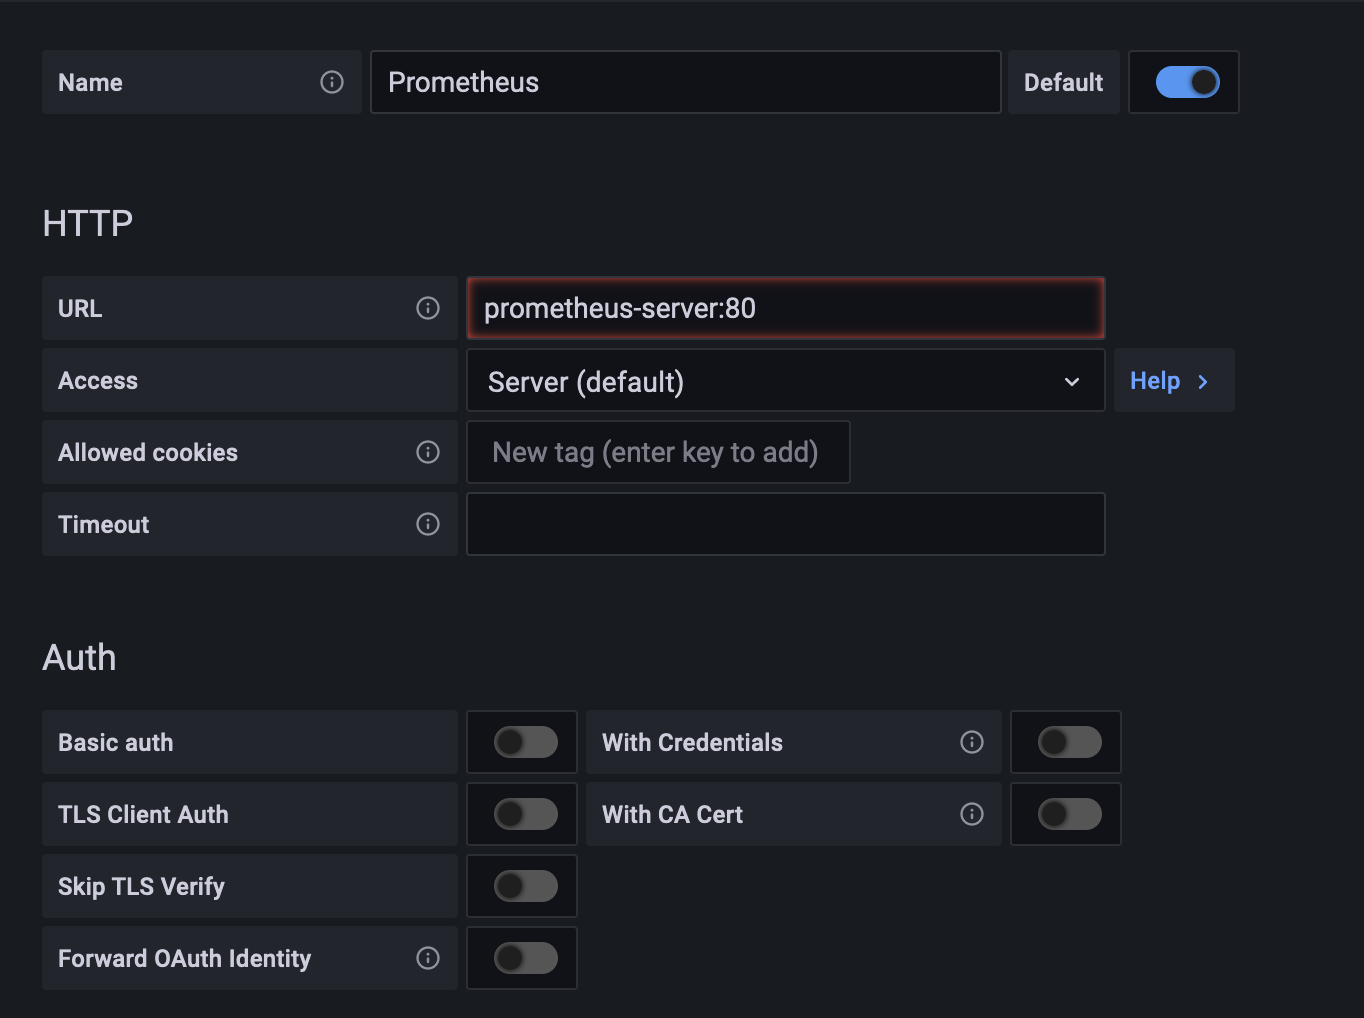
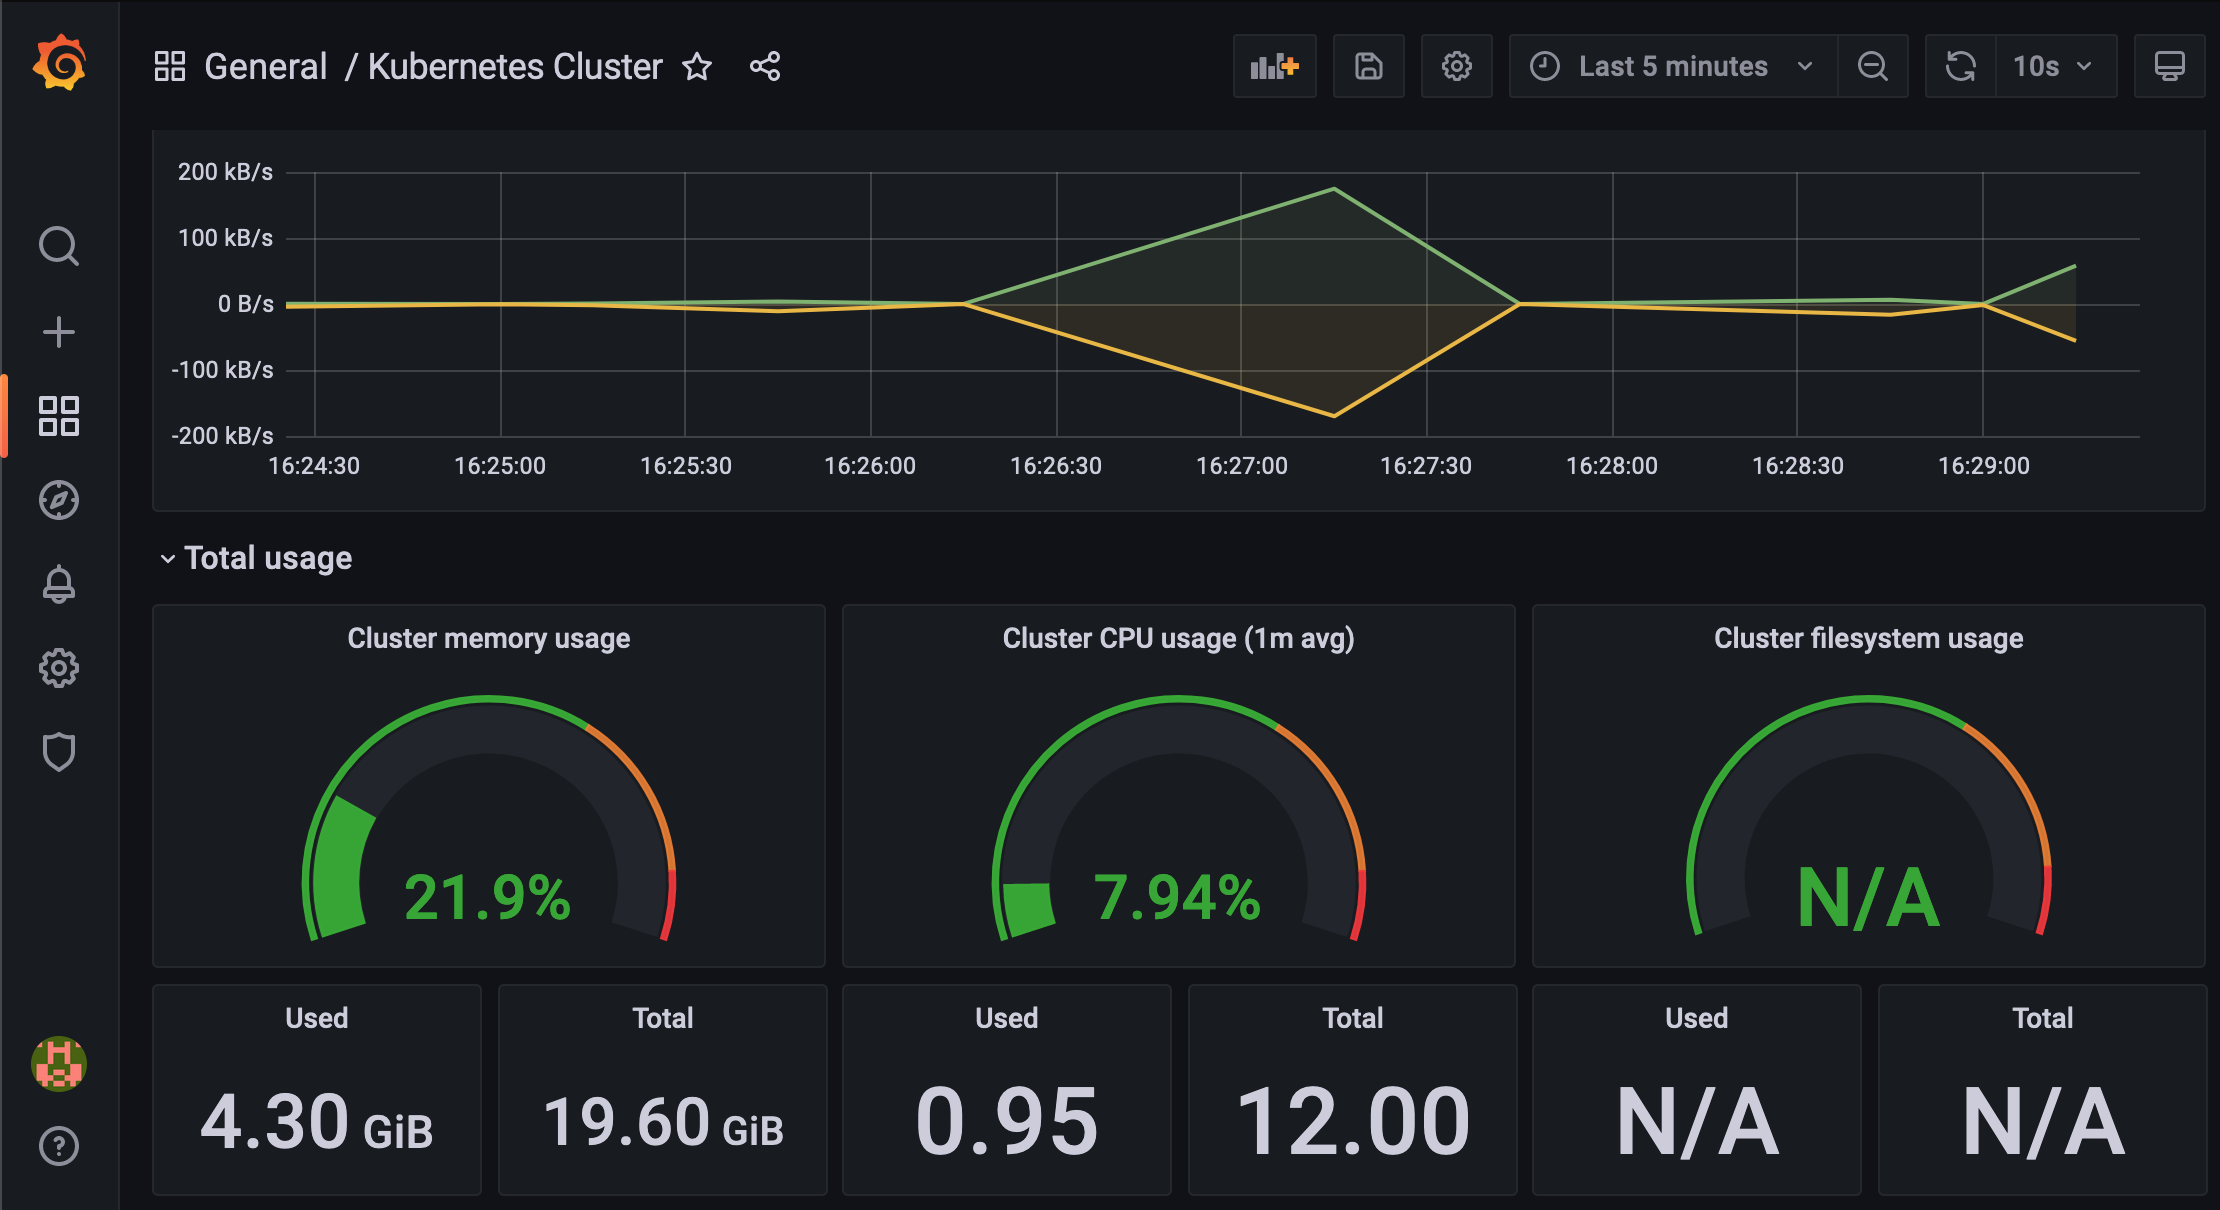
Have fun with dashboards!
Thoughts
Outside of being able to start doing dev work on this cluster, further configurations of Grafana/Prometheus should be taken care of. But as mentioned in the beginning, this was to get up and running fast.
Have fun!